
Tuesday, November 22, 2011

Friday, November 11, 2011
Poster

I chose this image because it made me think of summer and things being alive, it also really reminded me of Mont, who I love. I took this picture by getting as close as I could, which was still kind of far away, and then zooming in. I wanted to get the reflection as well as the the flower and lily pads, so I was careful to leave enough room for the reflection to fit into the picture. The editing I did on this was pretty basic. I adjusted the saturation to make the blue and green brighter. I adjusted the levels quite a lot because the flower in the middle was a little blown out, so I adjusted it until the flower was where I wanted it to be, then I went and masked out the areas that didn't need as much darkening. I used a smart filter to sharpen up the image. I sharpened it the most on the flower so that would be the main focus of the picture.
Saturday, November 5, 2011
Week 8, Night and light


2. Time for Ice cream: 11/2/2011. 9:22pm; Rexburg, Porter Park; f/8; 8.0sec; Panasonic DMC-LZ8
3. My Name?: 11/2/2011, 9:43pm; Porter Park; f/5.0; 8.0sec; Panasonic DMC-LZ8
4. Lamp post light: 11/2/2011, 9:30pm; Porter Park; f/8; 8.0sec; Panasonic DMC-LZ8
5. Slide: 11/2/2011, 9:34pm; Porter Park; f/3.3; 8.0sec; Panasonic DMC-LZ8
I didn't do any editing on any of these except for the last one, there was a ghost Rebekah in the slide picture, so I used the paint brush at a low opacity, and by matching the color to the background I painted over myself so I wasn't blocking any of the picture. You can still kind of tell where I was though. On all the picture I used a really slow shutter speed, and held the camera still on a tripod, except for the fourth picture. This one I used a slow shutter speed, pointed the camera at a lamp post, and moved my camera around as I was taking the picture.
Week 8, Fine Art Template


1. Salt Lake: 9/30/2011, 11:13am; Salt Lake City UT; f/5.9; 1/1000sec; Panasonic DMC-LZ8
2. Daisy: 10/6/2011, 10:51am; Rexburg, BYU-Idaho; f/5.8; 1/125sec; Panasonic DMC-LZ8
I started out by creating a template for both pictures. I started with a white background and added black rectangles on a new layer. Then I got a separate layer to stamp my signature on it, I put it on a separate layer so it would be easy to change and adjust the opacity. Then I added type, and changed it to the font and size I wanted it at. The I added the picture, I had already adjusted the pictures by changing the levels and adjusting the saturation. I also cropped the pictures to be the same size as the template, I changed the size to so the ppi was the same as the templates (150ppi). Then I selected the picture, and dragged it into the template picture. Then I selected create clipping mask and adjusted the picture to where I wanted it to be. After that I changed the background color and signature color so it would go better with the individual picture.
Saturday, October 29, 2011
Week 7, Edge Effects


1. Pink Flower: October 8, 2011, 3:25pm; BYUI gardens; f/5.7; 1/125sec; Panasonic DMC-LZ8
2. Bus: October 1, 2011, 11:29am; Salt Lake City UT; f/8; 1/1000sec; Panasonic DMC-LZ8
3. Lily: October 8, 2011, 3:20pm; BYUI gardens; f/5.7; 1/30sec; Panasonic DMC-LZ8
For the first picture I adjusted the levels and saturation to brighten the whole picture. I also made it black and white, then masked it out completely on the pink flower, and only slightly on the rest of the picture. Then I added an inch to the canvas size, and had the background be white. Then I drew a white rectangle over the picture then erased most of it, so only a small white line, then I feathered it, and lowered the opacity.
On the second image I did the same basic editing as I did on the first picture. I copied the layer, then I darkened the outside edge of the picture, then I added a small red line around the whole picture by leaving the selection selected, and clicking on the first layer. Then I went to Edit-stroke and selected the color and thickness I wanted the line to be.
On the last picture I did the same editing, except I sharpened it then masked out some of the water and lily pads so they wouldn't be as sharp as the flower. Then I used the rectangle marquee tool and made a rectangle about one inch inside the picture. Then I went into mask mode and went to filter and used the brush strokes sprayed tool. I increased the length a lot, and the radius as much as it it would go. Then applied this to the picture and changed the color to a green I got from a part of the picture.
Week 7, scanography

Single scan, Original

After




Collage scan

1. Fall face: October 29, 2011, 4:00; Spori building BYUI; Epson Expression 10000 XL; 300dpi
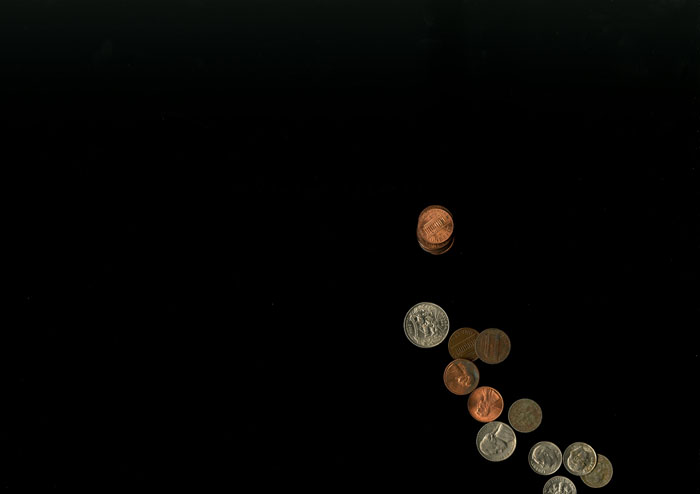
2-6. Poker: October 29, 2011, 4:15pm; Spori Building BYUI; Epson Expression 10000 XL; 300dpi
For the first scan I just placed a bunch of leafs and stuff on the scanner, then I put my face right next to the scanner, and then took the scan. In Photoshop I adjusted the levels I little to lighten it up, and I adjusted the vibrancy a little to make the red leafs look more bright.
For the poker picture I started by scanning in the cards, I scanned them all in at the same time. Then I did the cup, this was kind of hard because the cup kept moving, and for the first couple of tries you couldn't even see the cup, so I ended up putting a white paper over the cup so it wouldn't be so clear, then I was able to hold the cup still with my hand. That's why the cup is a little bit of a different color than the rest of the pictures in this collage. Then I scanned in the money, at first I tried to do dollar bills, turns out it's not okay to open that kind of image in Photoshop, so I scanned in coins instead.
Then I took all four images into Photoshop. I used the card picture as the background, and selected the cup, and moved it onto the card picture, I copied that layer so there would be two cups in the picture. Then I selected the coins and put that onto the card picture, I copied both picture of the coins so that it would look like there was more money in the middle than on the outside. I used a mask to get rid of the coins that were cut of.
Monday, October 24, 2011


2. Chain: Oct. 20, 2011, 1:22pm; Bannack Montana; f/3.3; 1/1000 sec; Panasonic DMC-LZ8
3. Peephole: Oct. 20, 2011, 5:13pm; Bannack Montana; f/3.3; 1/640 sec; Panasonic DMC-LZ8
4. Red roof: Oct. 20, 2011, 6:09pm; Bannack Montana; f/5.2; 1/160 sec; Panasonic DMC-LZ8
5. Wagon: Oct. 20, 2011, 5:03pm; Bannack Montana; f/6.3; 1/320 sec; Panasonic DMC-LZ8
On all of these pictures I adjusted the levels, saturation and vibrancy, especially on the first and fourth one though. The first one I adjusted it a lot, and then masked it out except for on the boots, I wanted them to have the more color than the rest of the picture. The second picture I added a blank layer and made the sky look a little more blue under were the chain is. The sky looked great on the outside of the chain, but then it turned white on the inside, so I just used the color from the rest of they sky and lightly painted it onto the white part of the sky. The peephole picture I sharpened the house and trees in the peep hole, and blurred the wood around the peephole so it would be less of a focus. I also darkened the wood, and lightened the house, and adjusted the saturation and vibrancy so the colors would be more bright in the peephole.The last picture I didn't do much editing, I just sharpened the wagon a little and made it brighter.
Subscribe to:
Posts (Atom)